Mudanças entre as edições de "Fusioninventory Linux"
| Linha 28: | Linha 28: | ||
'''<span style="background-color:#FFFF00;">apt-get install fusioninventory-agent-task-network</span>''' | '''<span style="background-color:#FFFF00;">apt-get install fusioninventory-agent-task-network</span>''' | ||
| − | |||
| Linha 34: | Linha 33: | ||
'''3. Logo após a instalação do Fusioninvetory deve alterar o arquivo do Agente.cfg.''' | '''3. Logo após a instalação do Fusioninvetory deve alterar o arquivo do Agente.cfg.''' | ||
| − | '''<span style="background-color:#FFFF00;">vim /etc/fusioninventory/agent.cfg</span>''' | + | '''<span style="background-color:#FFFF00;">vim /etc/fusioninventory/agent.cfg</span>''' |
| − | + | ||
'''4. Alterar o campo server para: ''' | '''4. Alterar o campo server para: ''' | ||
| Linha 41: | Linha 39: | ||
'''server = [http://suporte.tigcm.com.br/plugins/fusioninventory/ http://suporte.tigcm.com.br/plugins/fusioninventory/]''' | '''server = [http://suporte.tigcm.com.br/plugins/fusioninventory/ http://suporte.tigcm.com.br/plugins/fusioninventory/]''' | ||
| − | '''[[File:FI1.jpg|RTENOTITLE]]''' | + | '''[[File:FI1.jpg|RTENOTITLE]]''' |
| − | + | ||
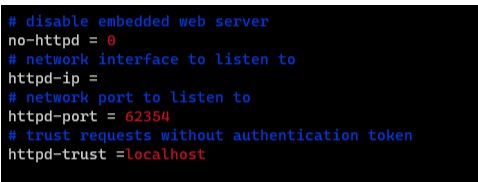
'''5. Adicionar a informação do <span style="background-color:#FFFF00;">http-trust: localhost</span>''' | '''5. Adicionar a informação do <span style="background-color:#FFFF00;">http-trust: localhost</span>''' | ||
| Linha 61: | Linha 58: | ||
'''<span style="background-color:#FFFF00;">systemctl restart fusioninventory-agent</span>''' | '''<span style="background-color:#FFFF00;">systemctl restart fusioninventory-agent</span>''' | ||
| + | |||
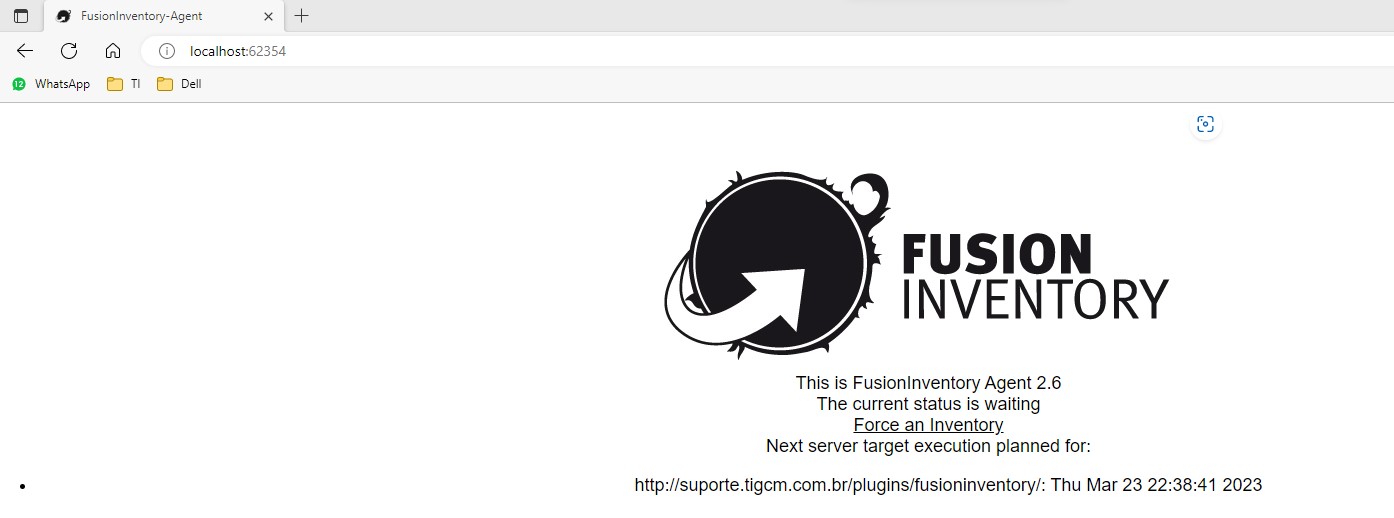
| + | '''Caso tenha dúvidas na instalação se foi bem concluida, basta acessar o navegador no seguinte endereço: | ||
| + | |||
| + | '''<span style="background-color:#FFFF00;">http://localhost:62354/</span>''' | ||
| + | |||
| + | '''[[File:Fuionfinal.jpg]]''' | ||
| + | |||
'''Pronto! Sistema instalado com sucesso.''' | '''Pronto! Sistema instalado com sucesso.''' | ||
Edição atual tal como às 09h41min de 23 de março de 2023
Instalação
1. Segue instalação do aplicativo FusionInventory via linha de comando no terminal.
2. Para instalar seguir as seguintes linhas de comando na ordem que está inserido:
su -
mkdir /install
cd /install
apt -y install dmidecode hwdata ucf hdparm
apt -y install perl libuniversal-require-perl libwww-perl libparse-edid-perl
apt -y install libproc-daemon-perl libfile-which-perl libhttp-daemon-perl
apt -y install libxml-treepp-perl libyaml-perl libnet-cups-perl libnet-ip-perl
apt -y install libdigest-sha-perl libsocket-getaddrinfo-perl libtext-template-perl
apt -y install libnet-snmp-perl libcrypt-des-perl libnet-nbname-perl
apt -y install libfile-copy-recursive-perl libparallel-forkmanager-perl
apt-get install fusioninventory-agent-task-network
3. Logo após a instalação do Fusioninvetory deve alterar o arquivo do Agente.cfg.
vim /etc/fusioninventory/agent.cfg
4. Alterar o campo server para:
server = http://suporte.tigcm.com.br/plugins/fusioninventory/
5. Adicionar a informação do http-trust: localhost
6. Agora adicione a TAG com o nome da unidade de acordo com o que foi passado pela TI.
Ex.: Unidade 200 - Várzea Grande - Tag: VarzeaGrande
7. Feito esse procedimento basta salvar e sair do editor.
8. Para finalizar basta reiniciar o agente:
systemctl restart fusioninventory-agent
Caso tenha dúvidas na instalação se foi bem concluida, basta acessar o navegador no seguinte endereço:
Pronto! Sistema instalado com sucesso.


